
Vinidex manufacturers and supplies a broad range of products & systems to suit a range of applications.
Vinidex’s products and systems are versatile and can be used in a variety of markets and applications.
A leaking Fitting Quick Connect can turn a clean work area into a trail of fluid, mist, or pressure loss. The visible drip is often only the final symptom. The real cause may involve damaged seals, incorrect tube insertion, vibration, contamination, or excessive side loading.
The U.S. Department of Energy’s Improving Compressed Air System Performance sourcebook estimates that compressed-air leaks can waste 20% to 30% of compressor output. That figure shows why a small connector leak deserves serious attention. It can increase energy use, reduce machine performance, and create avoidable maintenance risk. The leak may also worsen when temperature and pressure change.
Look closely at the connection.
A proper inspection should follow guidance from ISO 4413 for hydraulic systems and ISO 4414 for pneumatic systems. These standards emphasize suitable components, clean assembly, pressure control, and safe leak testing. Parker’s O-Ring Handbook also identifies compression set, chemical incompatibility, and surface damage as common sealing concerns.
Still, diagnosis is rarely perfect.
A technician may replace the seal and miss a scratched tube. Another may tighten the fitting and make the damage worse. This is why the investigation should examine the tube end, locking mechanism, seal condition, operating pressure, and installation method. A dry tissue can reveal a slow seepage around the fitting. A pressure gauge can expose performance loss that eyesight misses.
This guide explains why your Fitting Quick Connect may be leaking, how to identify the actual failure point, and when replacement is safer than adjustment. Expect practical checks, not assumptions.
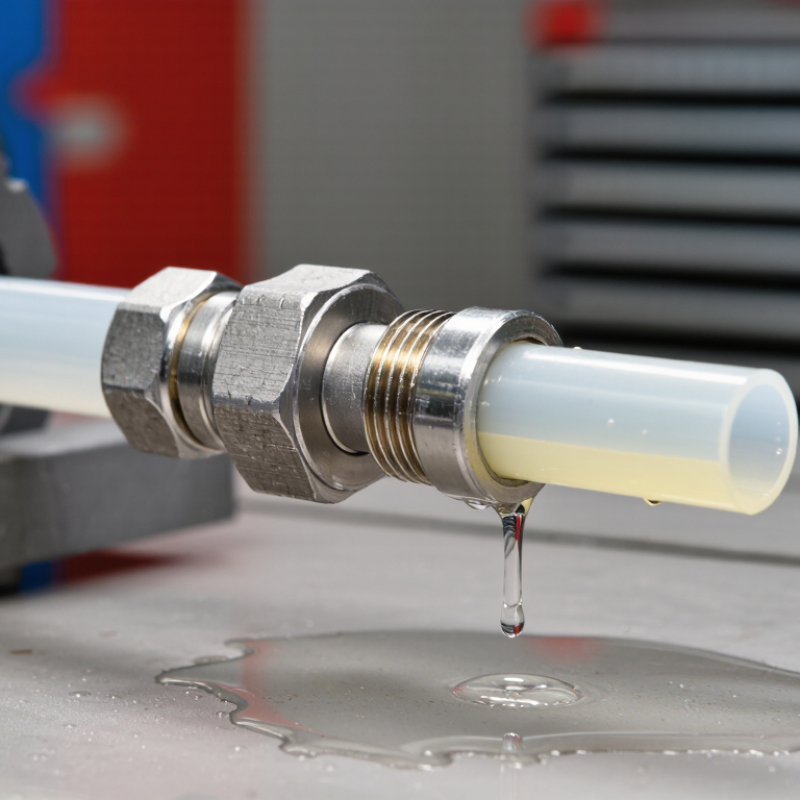
A leaking fitting quick connect usually points to a sealing or installation problem. The O-ring may be cut, flattened, dry, or contaminated with dust. Even a tiny scratch on the tube can create a slow drip. The tube must be cut squarely and pushed fully into the fitting. If it stops early, the connection may feel secure but remain unreliable. Incorrect tube diameter, excessive pressure, and high heat can also damage the seal. Vibration or side loading may gradually loosen the connection.
Tips:Shut off pressure before inspection. Wipe the fitting and tube clean. Check the O-ring, tube end, collet, and insertion depth. Pull the tube gently to confirm engagement. Do not tighten a Quick Connect Fitting by force. These fittings normally seal through proper insertion, not excessive torque.
A common inspection mistake is replacing the fitting before checking the tubing. That can waste time and leave the real cause untouched. In field maintenance, repeated leaks often come from bent tubing or movement near the connection. I have also seen apparently correct installations fail after temperature changes. The tube expanded, contracted, and disturbed the seal. If the fitting still leaks after cleaning and correct reinsertion, replace damaged parts with compatible components. Test the connection slowly, then observe it under normal operating pressure. A dry surface matters; small leaks can hide around threads or inside protective sleeves.
Why Is My Fitting Quick Connect Leaking?
How to Inspect the Connector, Hose, and Sealing Parts
A leaking quick-connect fitting needs more than a tighter connection. Start by isolating pressure and cleaning the joint. Look for scratches, dents, corrosion, or damaged locking balls inside the connector. The plug should seat fully, without rocking or stopping halfway. A faint hiss around the socket often signals contamination or incomplete engagement. Do not rely only on touch. Escaping air can be difficult to detect and may create a safety risk.
Inspect the hose next. Bend it gently near the fitting and check for cracks, hardening, blisters, or flattened sections. A hose can look acceptable while its reinforcement has weakened internally. The U.S. Department of Energy’s Improving Compressed Air System Performance sourcebook reports that leaks may waste 20–30% of compressor output in poorly maintained systems. That loss often begins with a small seal problem. Use a leak-detection solution around the joint, then watch for growing bubbles.
Examine the O-ring, gasket, and backup ring under bright light. Replace parts showing cuts, swelling, flattening, or permanent compression. Confirm that the seal material matches the fluid, temperature, and pressure conditions. ISO 4413 emphasizes correct component selection, cleanliness, and safe depressurization in hydraulic systems. A replacement seal may still leak if the groove is damaged or misaligned. This is easy to miss. I would also question any inspection that skips the hose end; the connector may be innocent. Reassemble by hand first, then test gradually while monitoring the joint.
A leaking quick connect usually points to a damaged seal, contamination, or incomplete engagement. Shut off the supply and release all pressure before touching the fitting. Never inspect a pressurized connection by hand.
A fine spray can injure skin and eyes.
Check the connector under bright light. Look for cuts, flattening, rust, or particles around the O-ring and mating face. Clean both sides with a lint-free cloth. Do not use sharp tools.
Reconnect the fitting until the locking mechanism fully engages, then pull it lightly to confirm it is seated. Many leaks come from side loading or misalignment. Tightening harder may damage the seal.
If the O-ring feels brittle, replace it with the correct material and size. Replace the complete quick connect when the socket, plug, threads, or locking balls show wear.
Follow the equipment maker’s torque guidance, because excessive force can distort the body. ISO 7241 and ISO 16028 provide dimensional and performance frameworks for several hydraulic quick-connect designs, but compatibility still requires checking pressure, temperature, fluid, and seal material.
The U.S. Department of Energy reports that compressed-air systems can lose 20–30% of compressor output through leaks. That figure explains why a small hiss deserves attention.
Soap solution can help locate a low-pressure air leak, but it is not suitable for every fluid. I have found that replacing only the seal sometimes fails. The connector may already be worn. A second inspection is worthwhile.
A leaking fitting quick connect often points to a damaged seal, contamination, or incomplete insertion. After repair, wipe the socket and plug completely dry. Check the O-ring for cuts, flattening, or grit. Replace questionable seals. Do not rely on the click alone. Reconnect the fitting firmly, then pull it gently by hand. It should not separate or slide outward.
Restore pressure slowly while standing clear of the connection. Watch the gauge for sudden movement. The U.S. Department of Energy reports that compressed-air leaks can waste 20–30% of compressor output, so a quiet leak still matters. Apply approved leak-detection fluid around the joint. Bubbles indicate escaping air. For liquid systems, place clean tissue beneath the fitting and inspect for wet marks. Never search for a hydraulic leak with your fingers. High-pressure fluid can penetrate skin. ISO 4414 also requires pneumatic systems to control stored energy during servicing.
Let the system reach its normal working pressure. Hold it for at least ten minutes, unless the equipment procedure specifies another period. Check the gauge again and inspect the fitting twice. That short test is useful, but it is not proof of long-term reliability. Temperature changes can alter pressure. Vibration can also reopen a weak connection. Record the pressure, test duration, and observed condition. If pressure falls or bubbles return, depressurize the system and replace the fitting or seal. Repeating the same connection may hide the real problem.
Pressure-decay testing helps verify a repaired quick-connect fitting. Pressurize the isolated connection to 100 psi, record the pressure at one-minute intervals, and compare the readings. A stable pressure indicates a properly seated seal, while a continuous pressure drop suggests contamination, seal damage, incomplete insertion, or fitting misalignment. Always follow the equipment manufacturer's specified test pressure and acceptance limit.
A leaking fitting quick connect is not always a simple tightening problem. In field service, technicians often find damaged O-rings, scratched tube ends, cracked bodies, or contaminated locking sleeves. A faint hiss can become a pressure drop, especially in vibrating equipment. The U.S. Department of Energy reports that compressed-air leaks can waste 20–30% of compressor output. That makes a small leak worth investigating.
Stop and seek professional service when the connector remains wet after depressurization and inspection. Do not tighten it while pressurized. A qualified technician can confirm the fluid, pressure, temperature, and connection standard before selecting a replacement. This matters because a connector rated for air may not suit water, oil, chemicals, or high-temperature service. The wrong seal can swell, harden, or fail without much warning.
Look closely. That helps.
Professional replacement is strongly recommended when threads are damaged, corrosion is visible, the tube will not seat fully, or the leak returns after a new seal. Repeated replacement may indicate misalignment, excessive hose movement, or incorrect installation torque. The International Fluid Power Society emphasizes proper component selection, cleanliness, and inspection in fluid-power maintenance. Still, a report cannot see your equipment. A careful technician must examine the actual assembly, and my first diagnosis may be wrong if the leak originates upstream. Record the operating pressure and take a clear photograph before service.
| Observed Condition | Most Likely Cause | Safe Initial Check | Recommended Response | Professional Service Trigger |
|---|---|---|---|---|
| Water appears around the connection immediately after pressurizing the line. | The tube is not fully inserted, or the cut is uneven and preventing the internal seal from seating correctly. | Shut off the supply, release pressure, remove the tube, and inspect whether the end is clean, straight, and free of damage. | Recut the tube squarely with a suitable tubing cutter and push it fully into the fitting according to the fitting instructions. | The fitting still leaks after correct tube preparation and reconnection. |
| A slow drip develops after the connection has been in service for some time. | The seal or internal gripping mechanism may be worn, contaminated, or affected by repeated movement. | Turn off the system and check for dirt, scale, chemical residue, or side-loading on the tube. | Clean only the accessible surrounding area and avoid forcing, twisting, or tightening components not designed for adjustment. | Leakage returns after cleaning, or the seal shows flattening, cuts, swelling, or hardening. |
| The tube can be pulled out or moves noticeably inside the fitting. | The tube may be the wrong size, insufficiently inserted, or not compatible with the fitting design. | Verify the tube outside diameter and inspect the tube for scratches, ovality, or deformation near the connection. | Do not operate the line under pressure until the connection has been correctly remade or replaced. | The tube remains loose, slips under normal pressure, or the correct fitting size cannot be confirmed. |
| The fitting body is cracked, distorted, or visibly damaged. | Impact, excessive tightening, vibration, thermal stress, or material deterioration may have compromised the housing. | Isolate the supply and inspect the body without applying additional force. | Replace the complete fitting; sealing tape or external adhesive is not a reliable repair for a cracked pressure component. | Always seek professional replacement when the fitting body, threaded section, or locking collar is damaged. |
| Leakage occurs only when the line or equipment is moving. | Bending, vibration, or unsupported tubing may be placing side-load on the seal and gripping parts. | Check whether the tube is sharply bent, stretched, or unsupported close to the fitting. | Remove strain where possible and secure the tubing without restricting its required movement. | The connection is part of a vibrating, heated, mobile, or high-pressure system. |
| The leak is accompanied by hissing, spraying, pressure loss, or rapid fluid discharge. | The connection may have failed under pressure, or the fitting may be unsuitable for the operating conditions. | Keep clear of the discharge path and shut off the nearest safe isolation valve if accessible. | Do not touch or disconnect the fitting while pressurized. Isolate, depressurize, and contain the released fluid. | Seek immediate professional service, especially for compressed gas, hot fluid, chemicals, or high-pressure water. |
| The connection leaks again after the fitting has been reinserted several times. | Repeated insertion can mark the tube end and wear the sealing or retention components. | Inspect the first section of tubing for repeated bite marks, grooves, or scratches. | Cut back to undamaged tubing if sufficient length remains; otherwise replace the fitting or tubing section. | The tube is too short to recut safely, or the internal parts appear worn or damaged. |
| The fitting is used with air, gas, refrigerant, fuel, chemicals, or another hazardous medium. | Material compatibility, pressure rating, temperature rating, or installation requirements may not have been satisfied. | Review the equipment documentation and safety data for the fluid before attempting any repair. | Do not experiment with sealants or substitute parts. Isolate the system and use a qualified technician. | Professional assessment is recommended for any hazardous, flammable, toxic, or regulated service. |
| The source of the leak cannot be identified confidently. | Fluid may be traveling along tubing or fittings from a different upstream failure point. | After isolation and depressurization, dry the area and inspect adjacent connections for fresh moisture or residue. | Avoid repeated tightening or disassembly until the actual leak path is established. | Call a professional when the leak location remains uncertain or access is restricted. |